- Get Glowing Skin Fast at Home: The 6-Step Routine That Works in 4 Weeks
- Why Your Skin Isn’t Glowing (And How to Fix It)
- Step 1: Cleanse With a Gentle, Non-Stripping Cleanser
- Step 2: Exfoliate 3–4 Times Weekly With Glycolic or Lactic Acid
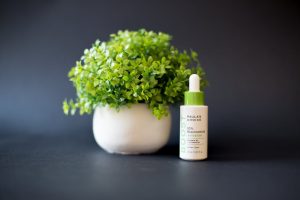
- Step 3: Layer Niacinamide to Minimize Pores and Balance Oil
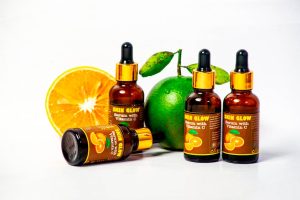
- Step 4: Brighten With Vitamin C Serum
- Step 5: Brighten Dark Circles With a Targeted Eye Cream
- Step 6: Moisturize and Protect With SPF Daily
Get Glowing Skin Fast at Home: The 6-Step Routine That Works in 4 Weeks
You don’t need a $300 facial to get that lit-from-within glow — the right home routine delivers real results in weeks, not months. After 10 years of working with clients from every skin type, I’ve narrowed down the exact steps and products that actually transform dull, congested skin into a radiant complexion you’ll notice immediately.
Why Your Skin Isn’t Glowing (And How to Fix It)
Dull skin isn’t a symptom — it’s a signal that dead cells are piling up, pores are congested, and your skin barrier needs support. The fastest path to glow isn’t moisturizer alone; it’s exfoliation + barrier repair + brightening ingredients working together.
Most people skip the exfoliation step because they’re afraid of irritation. That’s backwards. The right chemical exfoliant (glycolic or lactic acid) is gentler than physical scrubs and reveals fresh, glowing skin underneath — visible within days.
Step 1: Cleanse With a Gentle, Non-Stripping Cleanser
A clean slate is non-negotiable. But harsh cleansers strip your skin barrier, triggering dullness and congestion. Use a milk or gel cleanser that removes makeup and oil without leaving your skin tight.
Best for all skin types: CeraVe Foaming Facial Cleanser or Vanicream Gentle Cleanser. Both are fragrance-free, preserve your skin barrier with ceramides, and cost under $10. Cleanse twice daily — morning and night — for 60 seconds.
Step 2: Exfoliate 3–4 Times Weekly With Glycolic or Lactic Acid
Chemical exfoliation is the glow accelerator. These alpha-hydroxy acids dissolve the “glue” holding dead skin cells in place, revealing luminous skin underneath in days. Unlike physical scrubs, they don’t damage your barrier.
Start 2–3 times weekly and increase to 4 times if your skin tolerates it. If you have sensitive skin or are new to actives, use lactic acid first — it’s gentler than glycolic but equally effective.
Pixi Glow Tonic (5% glycolic acid): This is the gold standard for a reason. It’s a toner that glides on, works in 3–5 minutes, and delivers visible brightening within one week. The formula includes aloe vera to soothe, so sensitivity is minimal. Best for normal to oily skin.
Sunday Riley Good Genes Lactic Acid (10% lactic acid + hyaluronic acid): The gentler option if your skin is reactive or dry. Lactic acid hydrates while exfoliating, so you won’t feel stripped. This smooths texture and fades discoloration in 4–6 weeks. Apply 2–3 times weekly.
Application: After cleansing, apply either product with a cotton pad or your fingertips. Wait 5 minutes before moving to the next step. If you’re using glycolic acid, you may feel a light tingle — that’s normal. If it burns, rinse it off and use less frequently.
Step 3: Layer Niacinamide to Minimize Pores and Balance Oil
Niacinamide (vitamin B3) is the unsung MVP of glowing skin. It shrinks pores, regulates sebum production, calms inflammation, and strengthens your skin barrier — all while being gentle enough for every skin type, including sensitive and acne-prone skin.
The Ordinary Niacinamide 10% + Zinc 1%: This is the bestseller for a reason — it costs $7, delivers visible pore-minimizing results in 2 weeks, and has a cult following with 54,000+ five-star reviews. The high concentration of niacinamide plus zinc controls oil without feeling sticky. Best for oily, congested, and acne-prone skin.
Glow Recipe Watermelon Glow Niacinamide: A more luxe option with the same niacinamide power plus hyaluronic acid and watermelon extract for hydration and brightening. The formula feels lighter and smells amazing. Best for dry, dehydrated, and sensitive skin.
Application: Apply 1–2 pumps to damp skin (right after your exfoliant or on a non-exfoliant day, after cleansing). Wait 1 minute for it to sink in before moving to your next product. You can use niacinamide every single day, morning and night.
Step 4: Brighten With Vitamin C Serum
Vitamin C is the brightening powerhouse. It neutralizes free radicals, boosts collagen, fades dark spots and discoloration, and gives your skin that luminous, well-rested glow. But most vitamin C serums are unstable and oxidize quickly, turning orange and losing potency.
CeraVe Vitamin C Serum: A dermatologist-approved formula with 10% L-ascorbic acid (the most bioavailable form of vitamin C), plus ceramides to repair your barrier while brightening. It’s fragrance-free, stable, and gentle enough for daily use. Results appear in 4–8 weeks with consistent use. Best for all skin types, including sensitive skin.
Application: Apply 2–3 drops to clean, damp skin in the morning (vitamin C works best in the AM). Wait 1–2 minutes before moisturizing. Store in a cool, dark place or your fridge to extend shelf life.
Step 5: Brighten Dark Circles With a Targeted Eye Cream
Dark circles make your entire face look tired and dull. A brightening eye cream with vitamin C or caffeine targets this delicate area and lifts your whole look in weeks.
Ole Henriksel Banana Bright Eye Crème: This brightens dark circles in as little as 2 weeks thanks to vitamin C and banana powder that reflect light and camouflage discoloration. The creamy texture hydrates the delicate eye area without feeling heavy. Dermatologist-approved and cult-favorite with over 8,000 five-star reviews.
Application: Use your ring finger (the weakest finger, so you don’t tug this delicate skin) to gently tap a tiny amount around the orbital bone, avoiding the lid itself. Use morning and night.
Step 6: Moisturize and Protect With SPF Daily
All this hard work is undone by sun damage. UV exposure triggers inflammation, oxidative stress, and pigmentation — the opposite of glow. A good moisturizer + sunscreen every single day (yes, even cloudy days and indoors if you’re near windows) is non-negotiable.
Moisturizer: Use a lightweight moisturizer (CeraVe Daily Moisturizing Lotion or Neutrogena Hydro Boost Hydrating Tint) if you have oily skin, or a richer cream (CeraVe Moisturizing Cream in the tub) if you’re dry. Apply to damp skin to lock in hydration from your serums.
Sunscreen: Use a broad-spectrum SPF 30 or higher every morning. Mineral sunscreens (zinc oxide, titanium dioxide) are gentler on sensitive skin; chemical sunscreens absorb faster for oily skin. Non-negotiable: reapply every 2 hours if you’re outdoors.
Your Complete 4-Week Glow Routine at a Glance
When to Expect Results
Week 1–2: You’ll notice your skin looks fresher and less congested. Pores appear tighter. Your complexion feels smoother because dead skin is being shed.
Week 3–4: Visible brightening. Your skin tone is more even. Dark spots and discoloration begin to fade. Dark circles look lighter. Your skin has that coveted “lit from within” glow.
Week 5–8: Full results. Texture is smoother, pores are visibly smaller, and your overall radiance is unmistakable. Consistency is everything — missing days will slow results.
Pro Tips for Maximum Glow
Layer products on damp skin: Your serums absorb better and penetrate deeper when applied to slightly damp skin. After cleansing, wait 30 seconds before applying the next product.
Use the “less is more” rule: One pump of serum is enough. More product doesn’t mean better results — it just sits on top of your skin and feels greasy. Start small and build if needed.
Don’t skip hydration: Dehydrated skin looks dull and flat. Drink water, use a hydrating toner if your skin is dry, and avoid over-exfoliating. If your skin feels tight or tight after exfoliation, you’re doing it too often.
Sleep is non-negotiable: Your skin repairs and regenerates at night. Poor sleep triggers inflammation, increases cortisol, and dulls your complexion overnight. Aim for 7–9 hours every night.
Frequently Asked Questions
Q: Can I use all these products if I have sensitive skin?
A: Yes, but start slowly. Begin with just the cleanser, niacinamide, and moisturizer for 2 weeks. Then add the vitamin C serum. Wait another 2 weeks before introducing chemical exfoliation. If you have eczema or rosacea, use lactic acid (Sunday Riley Good Genes) over glycolic acid — it’s gentler. Always do a 24-hour patch test on your jawline before committing.
Q: What if my skin gets worse before it gets better?
A: This is “skin purging” — totally normal. When you exfoliate, you’re bringing congestion to the surface. This usually lasts 1–2 weeks. If it lasts longer than 3 weeks, your skin is reacting (not purging), and you should reduce frequency or stop the exfoliant. Never push through genuine sensitivity.
Q: Can I use this routine if I’m on prescription retinol or acne medication?
A: Yes, but skip the chemical exfoliant. Retinol and prescription acne meds are already exfoliating; adding glycolic or lactic acid will over-exfoliate and damage your barrier. Use the cleanser, niacinamide, vitamin C, eye cream, moisturizer, and SPF. Once your skin adjusts to the retinol (after 8–12 weeks), you can introduce the exfoliant 1–2 times weekly on non-retinol nights.
Q: Is this routine safe during pregnancy?
A: Yes. All products in this routine are pregnancy-safe, including niacinamide, lactic acid, and vitamin C. The only ingredient to avoid during pregnancy is retinol (and retinoids), but this routine doesn’t include it. Always check with your OB-GYN, but glycolic acid, niacinamide, and vitamin C are considered safe topical actives during pregnancy and breastfeeding.
Join readers getting honest product reviews, ingredient breakdowns, and routines that actually work. No spam, ever.
Subscribe Free →Unsubscribe anytime. We respect your privacy.